
In my Agent Protocols - MCP, A2A, A2UI, AG-UI post, I provided a high-level overview of some of the main agent protocols: MCP, A2A, A2UI, and AG-UI. In the Agent-User Interaction Protocol (AG-UI) with Agent Development Kit (ADK) post, I zoomed into the AG-UI protocol and showed how it can be used with Google’s Agent Development Kit (ADK).
In today’s post, I’ll zoom into the A2UI protocol and show how it can be used with Google’s Agent Development Kit (ADK).
Agent to UI Protocol (A2UI)
A2UI is a generative UI protocol, from Google, that enables AI agents to generate rich,
interactive user interfaces across web, mobile, and desktop. The idea with A2UI is that when a user asks a question to an
agent, e.g. What are some good restaurants in New York?, the agent can not only return the list of restaurants,
but also return UI descriptions that can be used by renderers to display the restaurants in a rich and interactive format.
You can read the Core Concepts for the details of the protocol but here’s a summary.
Message types and format
There are 4 primary message types in A2UI:
- createSurface: Create a new surface and specify its catalog.
- updateComponents: Add or update UI components in a surface.
- updateDataModel: Update application state.
- deleteSurface: Remove a UI surface.
They’re in JSON format and describe the UI and data for the UI:
{
  "version": "v0.9",
  "createSurface": {
    "surfaceId": "main",
    "catalogId": "https://a2ui.org/specification/v0_9/basic_catalog.json"
  }
}
{
  "version": "v0.9",
  "updateComponents": {
    "surfaceId": "main",
    "components": [...]
  }
}
{
  "version": "v0.9",
  "updateDataModel": {
    "surfaceId": "main",
    "path": "/user",
    "value": { "name": "Alice" }
  }
}
Components
A2UI defines a standard catalog of UI components organized by purpose:
- Layout: Row, Column, List - arrange other components
- Display: Text, Image, Icon, Video, Divider - show information
- Interactive: Button, TextField, CheckBox, DateTimeInput, Slider - handle user input
- Container: Card, Tabs, Modal - group and organize content
For the complete component gallery with examples, see the Component Reference
Message Flow
Here’s an example Restaurant Booking message flow from the documentation.
- Agent creates surface:
{
  "version": "v0.9",
  "createSurface": {
    "surfaceId": "booking",
    "catalogId": "https://a2ui.org/specification/v0_9/basic_catalog.json"
  }
}
- Agent defines UI structure:
{
  "version": "v0.9",
  "updateComponents": {
    "surfaceId": "booking",
    "components": [
      {
        "id": "root",
        "component": "Column",
        "children": ["header", "guests-field", "submit-btn"]
      },
      {
        "id": "header",
        "component": "Text",
        "text": "Confirm Reservation",
        "variant": "h1"
      },
      {
        "id": "guests-field",
        "component": "TextField",
        "label": "Guests",
        "value": { "path": "/reservation/guests" }
      },
      {
        "id": "submit-btn",
        "component": "Button",
        "child": "submit-text",
        "variant": "primary",
        "action": {
          "event": {
            "name": "confirm",
            "context": {
              "details": { "path": "/reservation" }
            }
          }
        }
      }
    ]
  }
}
- Agent populates data:
{
  "version": "v0.9",
  "updateDataModel": {
    "surfaceId": "booking",
    "path": "/reservation",
    "value": {
      "datetime": "2025-12-16T19:00:00Z",
      "guests": "2"
    }
  }
}
User edits guests to “3” → Client updates
/reservation/guestsautomaticallyUser clicks “Confirm” → Client sends action:
{
  "version": "v0.9",
  "action": {
    "name": "confirm",
    "surfaceId": "booking",
    "context": {
      "details": {
        "datetime": "2025-12-16T19:00:00Z",
        "guests": "3"
      }
    }
  }
}
- Agent responds → Updates UI or sends:
{
  "version": "v0.9",
  "deleteSurface": { "surfaceId": "booking" }
}
Transport Options
A2UI is transport-agnostic, meaning any mechanism that can deliver JSON messages works. Currently, A2A and AG-UI are supported as transport layers, with REST API, WebSockets, and SSE as planned or proposed. See Transports for the latest supported transports.
Renderers
Once the A2UI JSON messages are generated by the agent, they need to be converted into native UI components by renderers. For web, there are Lit and Angular renderers and Flutter (GenUI SDK) for mobile/desktop/web. You can see Maintained Renderers for the full list.
A2UI vs. AG-UI
Now that we understand the basics of A2UI, let’s also understand its relationshis with AG-UI. Despite similar names, AG-UI and A2UI serve very different and complementary roles in the agentic application stack:
- AG-UI connects your user-facing application to the agentic backend.
- A2UI is a declarative generative UI spec, that agents use to return UI widgets as part of their responses.

See AG-UI and Generative UI Specs and AG-UI and A2UI for more details.
A2UI with Agent Development Kit (ADK)
Let’s look at some samples of how you can generate UI with A2UI and ADK agents.
Before you start
Clone the repository:
git clone https://github.com/google/a2ui.git
cd a2ui
Set your Gemini API key:
export GEMINI_API_KEY="your_gemini_api_key_here"
Samples have server (agent) and client (renderer) parts that both need to be started. You can find different ADK agent samples in adk and client renderers in client folders in the A2UI repo.
Restaurant Finder app
To run the restaurant finder app, start both the agent and the client servers.
Inside the samples/client/lit folder:
npm run demo:restaurant
Navigate to http://localhost:5173/?app=restaurant and start prompting your AI agent. For example Top 5 Chinese restaurants in New York:
You should see the UI generated by the agent and rendered on the client side:

If you look into the logs, you should also see the A2UI JSON response:
[REST] LiteLLM completion() model= gemini-2.5-flash; provider = gemini
[REST] INFO:agent:Event from runner: model_version='gemini-2.5-flash' content=Content(
[REST]   parts=[
[REST]     Part(
[REST]       text="""<a2ui-json>
[REST] [
[REST]   {
[REST]     "beginRendering": {
[REST]       "surfaceId": "default",
[REST]       "root": "root-column",
[REST]       "styles": {
[REST]         "primaryColor": "#FF0000",
[REST]         "font": "Roboto"
[REST]       }
[REST]     }
[REST]   },
[REST]   {
[REST]     "surfaceUpdate": {
[REST]       "surfaceId": "default",
[REST]       "components": [
[REST]         {
[REST]           "id": "root-column",
[REST]           "component": {
[REST]             "Column": {
[REST]               "children": {
[REST]                 "explicitList": [
[REST]                   "title-heading",
[REST]                   "item-list"
[REST]                 ]
[REST]               }
[REST]             }
[REST]           }
[REST]         },
...
Let’s take a look at what’s happening under the hood.
On the agent side, you can review the agent code in samples/agent/adk/restaurant_finder. Specifically, prompt_builder.py shows how to build the prompt for the agent to generate A2UI responses.
We’re instructing the agent to generate A2UI responses using the following prompt:
ROLE_DESCRIPTION = (
    "You are a helpful restaurant finding assistant. Your final output MUST be a a2ui"
    " UI JSON response."
)

UI_DESCRIPTION = """
-   If the query is for a list of restaurants, use the restaurant data you have already received from the `get_restaurants` tool to populate the `dataModelUpdate.contents` array (e.g., as a `valueMap` for the "items" key).
-   If the number of restaurants is 5 or fewer, you MUST use the `SINGLE_COLUMN_LIST_EXAMPLE` template.
-   If the number of restaurants is more than 5, you MUST use the `TWO_COLUMN_LIST_EXAMPLE` template.
-   If the query is to book a restaurant (e.g., "USER_WANTS_TO_BOOK..."), you MUST use the `BOOKING_FORM_EXAMPLE` template.
-   If the query is a booking submission (e.g., "User submitted a booking..."), you MUST use the `CONFIRMATION_EXAMPLE` template.
"""
The A2uiSchemaManager loads component catalogs, generates system prompts that teach the LLM how to produce valid A2UI
JSON, and generate_system_prompt method combines your agent’s role description with the A2UI JSON schema and few-shot
examples, so the LLM knows exactly how to format its output:
version = VERSION_0_9
restaurant_prompt = A2uiSchemaManager(
    version,
    catalogs=[
        BasicCatalog.get_config(
            version=version,
            examples_path=f"examples/{version}",
        )
    ],
    schema_modifiers=[remove_strict_validation],
).generate_system_prompt(
    role_description=ROLE_DESCRIPTION,
    ui_description=UI_DESCRIPTION,
    include_schema=True,
    include_examples=True,
    validate_examples=True,
)
Then you create your agent with the system prompt in agent.py:
return LlmAgent(
    model=LiteLlm(model=LITELLM_MODEL),
    name="restaurant_agent",
    description="An agent that finds restaurants and helps book tables.",
    instruction=instruction,
    tools=[get_restaurants],
)
Once the agent generated the JSON output, you need to validate it against the A2UI schema before streaming back to the client:
# --- Validation Steps ---
# Check if it validates against the A2UI_SCHEMA
# This will raise jsonschema.exceptions.ValidationError if it fails
logger.info(
    "--- RestaurantAgent.stream: Validating against A2UI_SCHEMA... ---"
)
selected_catalog.validator.validate(parsed_json_data)
You can see A2UI - Agent-to-UI for ADK for more details.
On the client side, you can take a look at the Lit implementation of A2UI in renderers/lit which takes the generated JSON and renders it.
There are more samples in the A2UI repo, you can check out my repo on how to run the Contact manager app and A2UI Component Gallery Agent
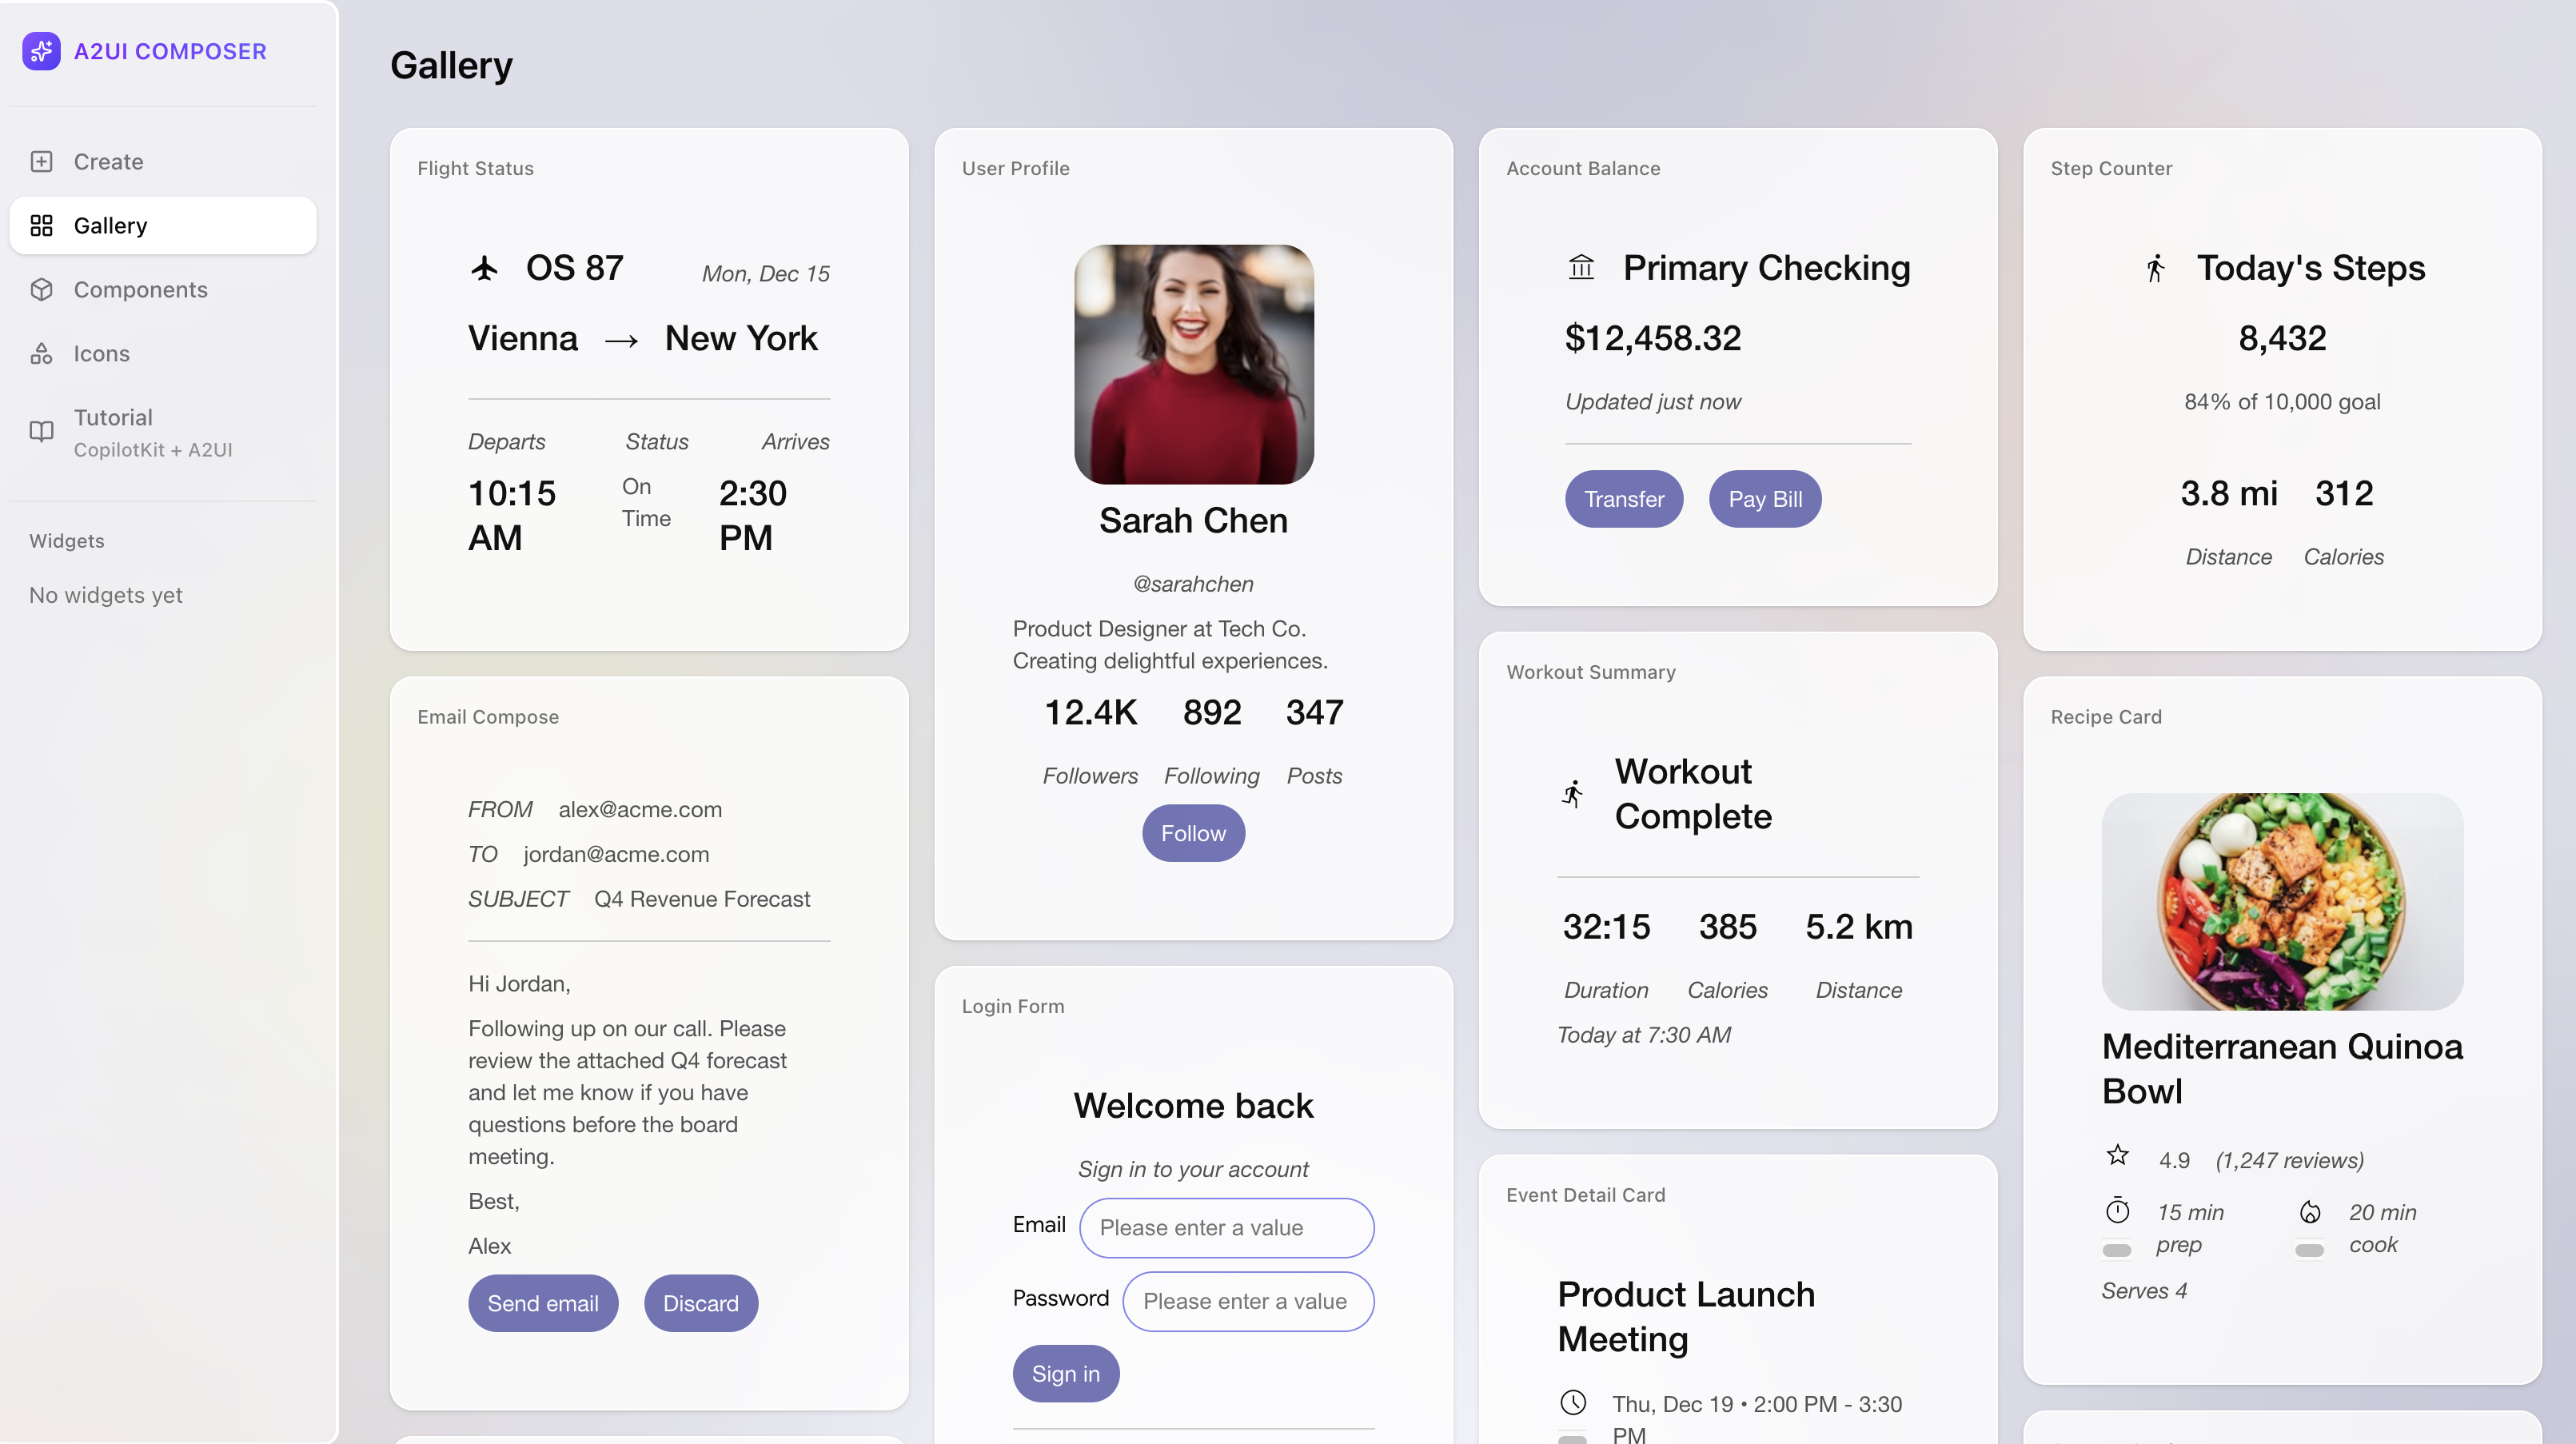
CopilotKit A2UI Starter and A2UI Composer
Last but not least, CopilotKit has a great A2UI Starter template to help you get started with A2UI, as well as the A2UI Composer to experiment with A2UI components.
You can check out my repo on how to run the A2UI Starter.
Summary
In this blog post, we looked into A2UI in more detail, learned how to use A2UI with ADK, and explored some of the available tools to help you get started with A2UI. Here are some resources to learn more:
- Docs: A2UI protocol
- GitHub: A2UI & A2UI protocol spec
- Blog: Introducing A2UI: An open project for agent-driven interfaces
- A2UI — Agent-to-UI for ADK
- CopilotKit A2UI Composer
- GitHub: CopilotKit <> A2A + A2UI Starter
- YouTube: A2UI: The Protocol That Makes AI Design Functional UIs
- YouTube: AI Agents Can Now Build Their Own UI in Real Time