Cloud Code has been providing IDE support for the development cycle of Kubernetes and Cloud Run applications for a while now. I’m happy to report that the Dec 2022 version (1.21.0) of Cloud Code now supports Cloud Functions!
In this first release of Cloud Functions support, you can:
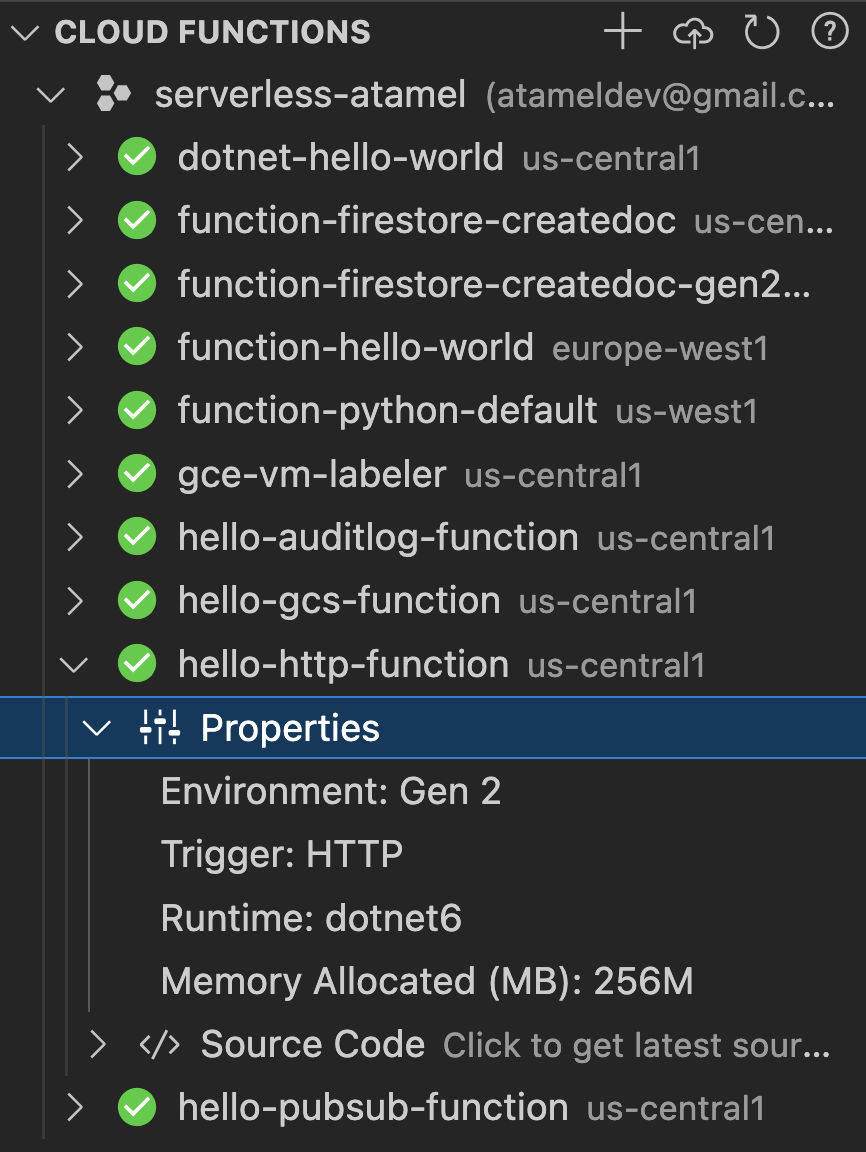
- Use the Cloud Functions Explorer to view your project’s Cloud Functions properties and source code.
- Download your Cloud Functions to edit your code locally, then configure your local workspace to deploy those changes directly from Cloud Code.
- Invoke your HTTP-triggered functions from VS Code.
- Use the Cloud Code Logs Viewer to view logs from your Cloud Functions.
Let’s take a closer look.
Installation
If you’ve been working with Cloud Code, you likely already have it installed in VS Code. You just need to make sure you have the Dec 2022 version (1.21.0) of Cloud Code by checking it under extensions:

If not, you can follow the installation instructions here.
Browse and invoke deployed functions
You’ll notice a new Cloud Functions browser on the left. Here, you can see a list of deployed functions as well as details of your functions such as the trigger type (HTTP triggered, event triggered) and the runtime (Node.js, Java, .NET, etc.) of the function.
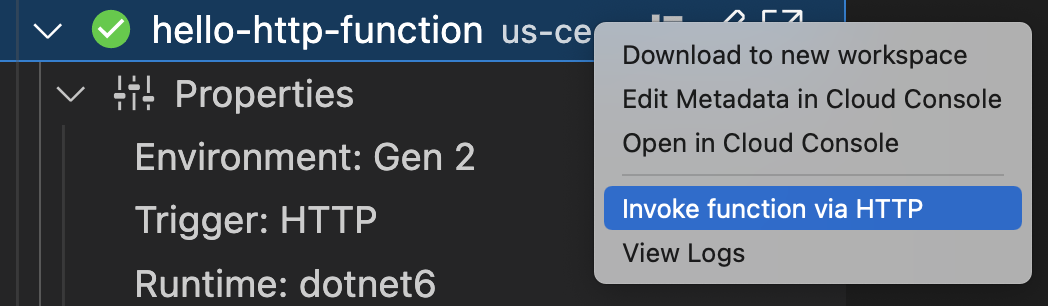
You can quickly test HTTP triggered functions by right-clicking and selecting
Invoke function via HTTP. This sends an HTTP request with the right
authentication header to the deployed function.
This is very handy to quickly test HTTP-triggered functions but it currently does not work against event-triggered functions, as those require a CloudEvent rather than a plain HTTP call. It also only works for deployed functions and not against functions running locally.
Create and deploy a new function
You can also create and deploy a new function from Cloud Code.
To create a new function:
- Either click the Cloud Code toolbar at the bottom of VS Code or the plus (+) icon on the right of Cloud Functions browser.
- Choose
New Application - Choose
Cloud Functions - Choose a template for one of the supported languages: Node.js, Python, Go, Java
This creates a new workspace, with an HTTP-triggered Hello World Cloud Function and with the language you chose.
To deploy the function, click the deploy icon next to the workspace folder and follow the prompts to choose your project, region, and runtime.
Edit a deployed function
You can also edit an already deployed function by downloading it to a new workspace:
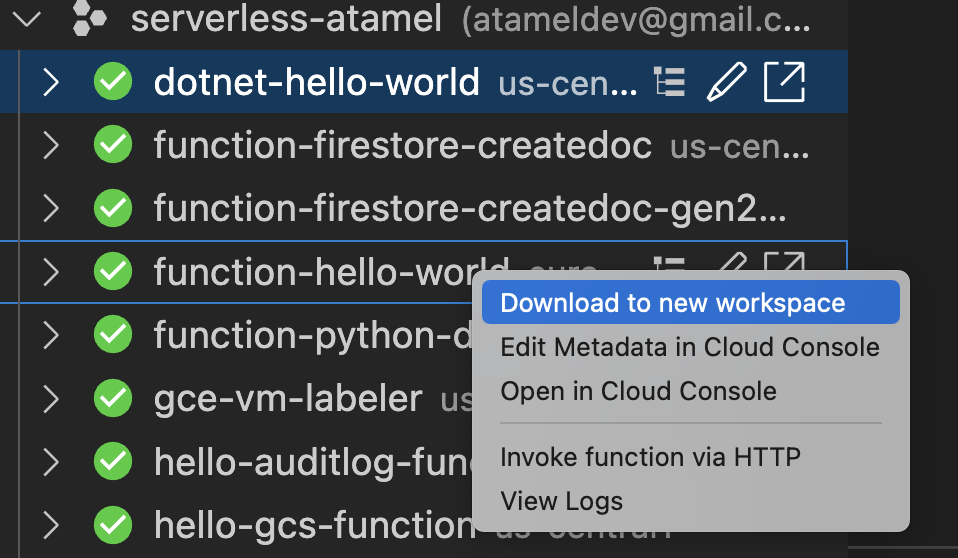
This downloads the code of the function locally to a new workspace. Once you make the edits, you can deploy it, similar to deploying a new function.
View logs of a deployed function
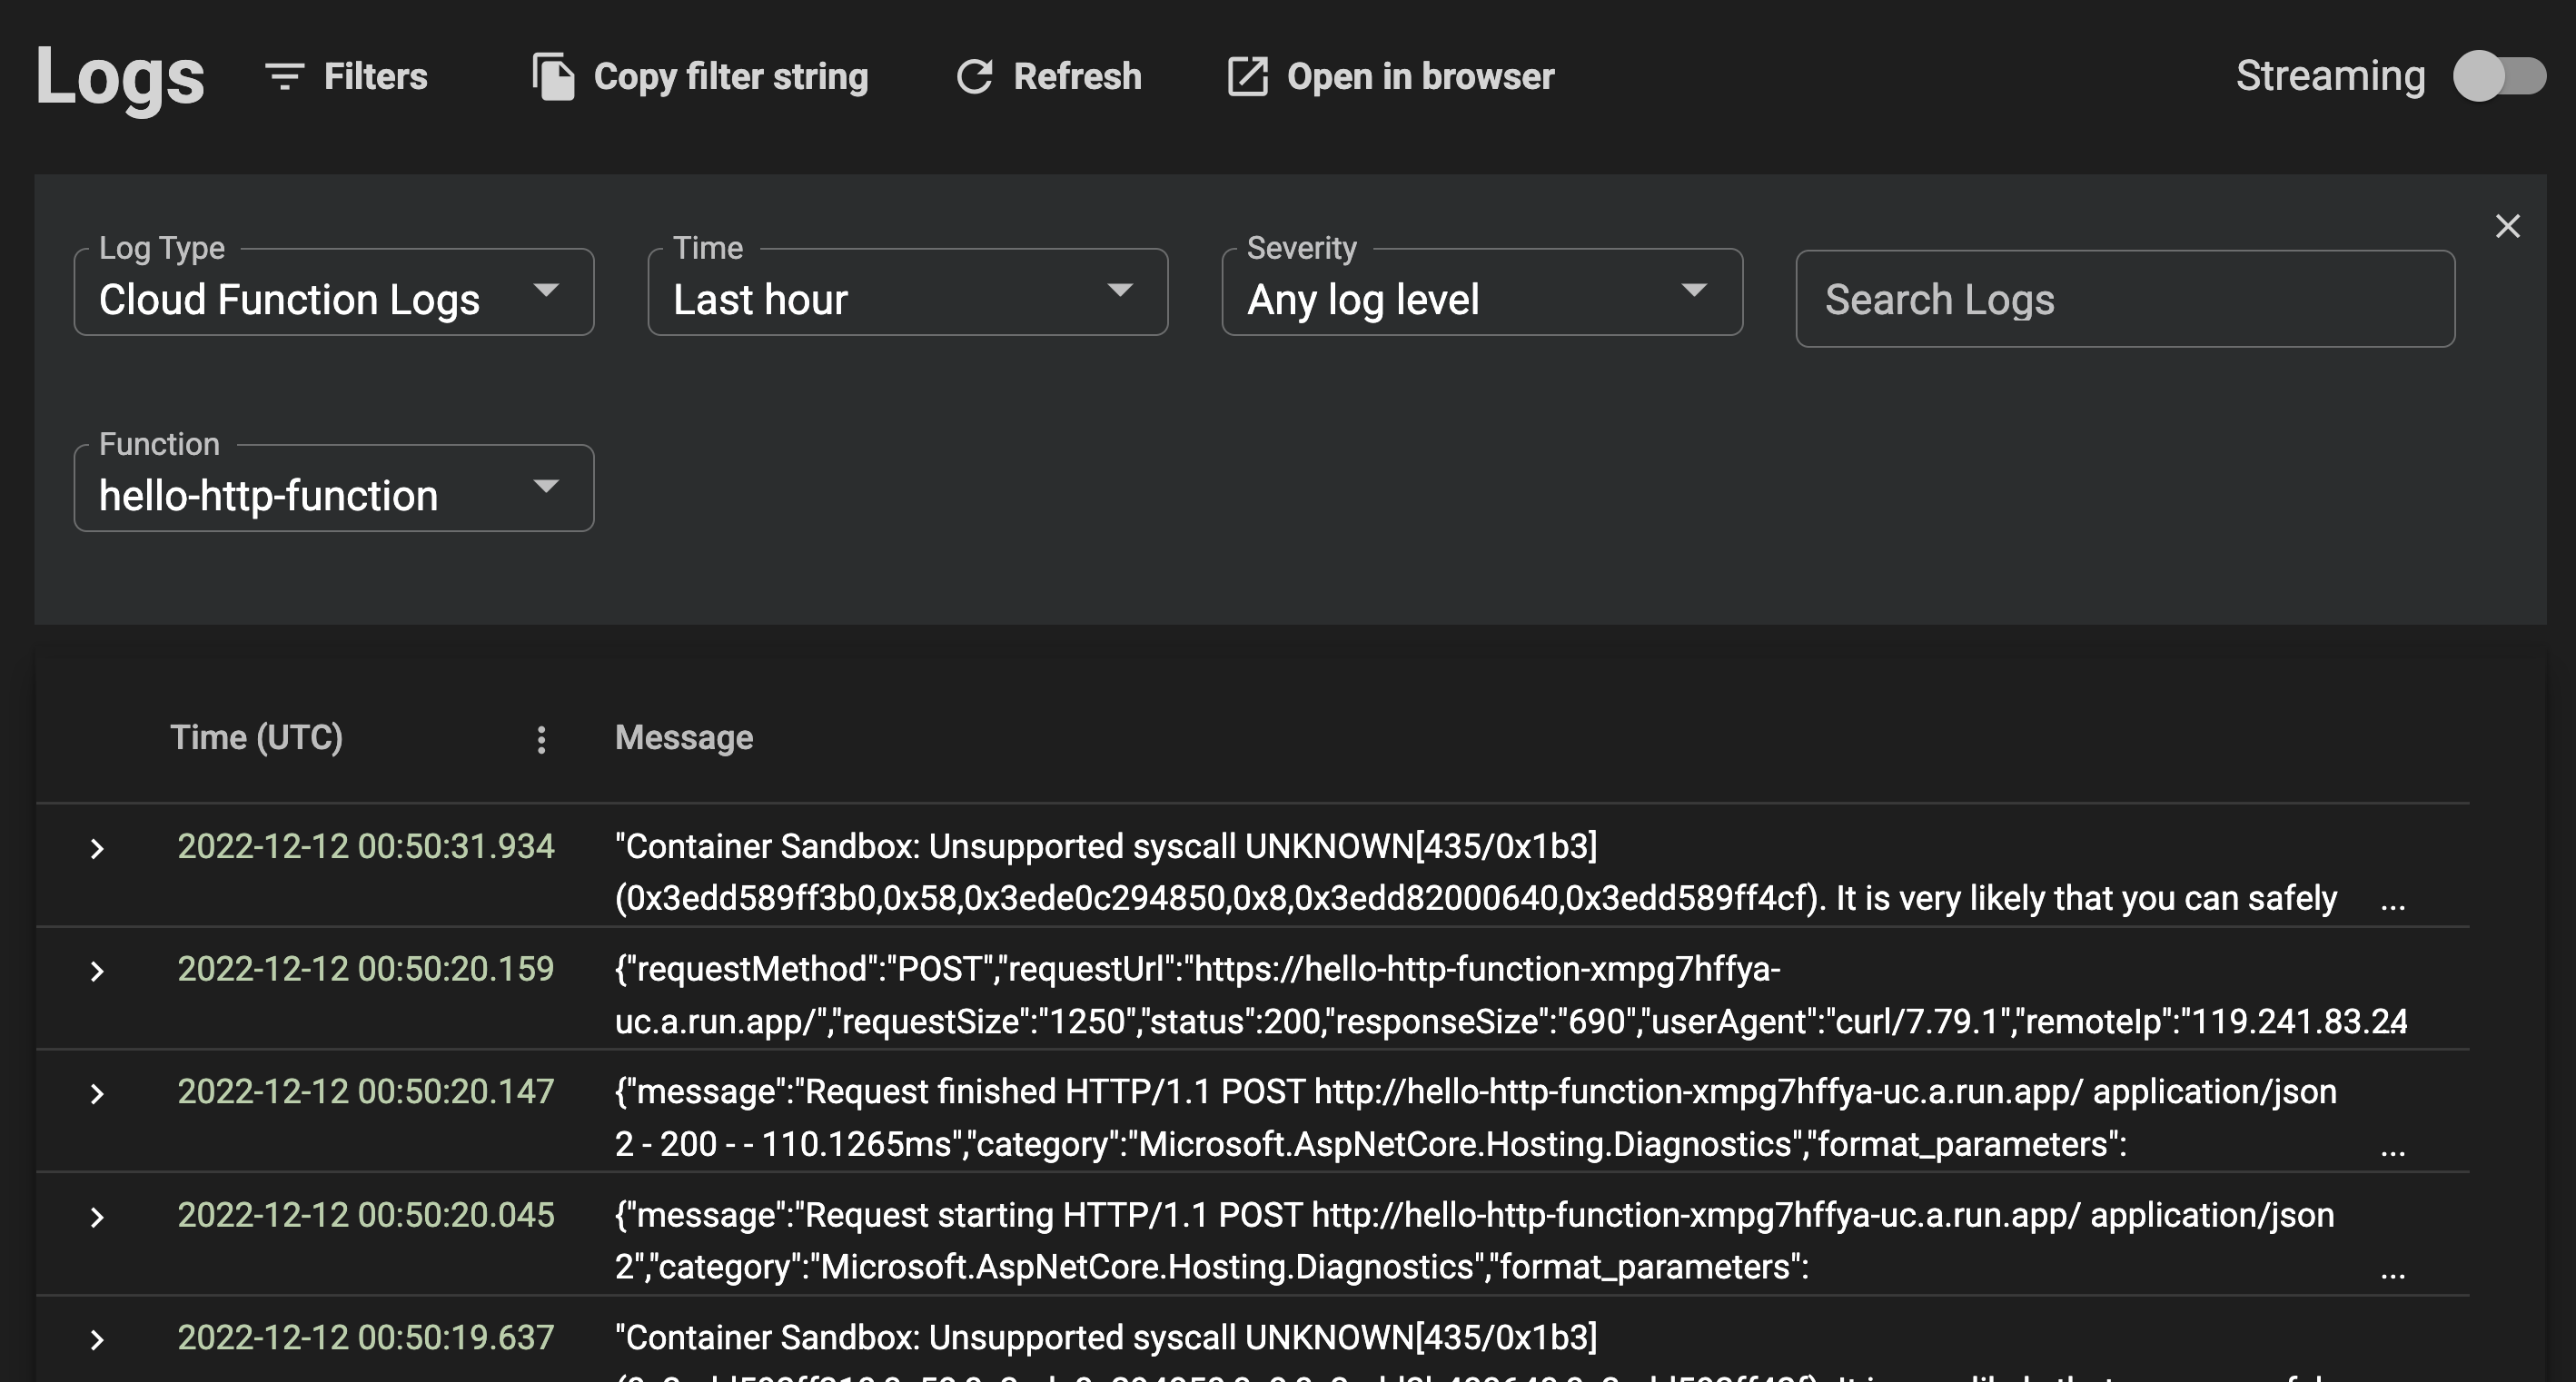
Once you have the function deployed and running, you can view the logs by right
clicking on the function and selecting View logs. This opens up the logs
viewer in Cloud Code:
Limitations
The new Cloud Functions support in Cloud Code makes it easier to create and deploy Cloud Functions right from VS Code, but keep the following limitations in mind:
- Templates are only for HTTP-triggered functions. No templates for event-triggered functions yet.
- Testing only works against deployed HTTP-triggered functions. No testing support for locally running functions of event-triggered functions.
- Only four languages are supported (Node.js, Python, Go, and Java) in templates and deployment. I especially missed the .NET support.
On the last point, Cloud Code provides an excellent extension mechanism where you can add templates for sample applications. In a future blog post, I’ll show you how you can create and use your own templates for some of these missing features such as .NET functions and event-triggered functions.
Check out Create and deploy a function with Cloud Code for VS Code for official docs and reach out to me on Twitter @meteatamel if you have questions or feedback.