In my previous post, I talked about basic of AsyncAPI. In this post, I want to get into more details on some tools around AsyncAPI.
More specially, we’ll install AsyncAPI CLI and Generator, generate a sample AsyncAPI definition, visualize it in AsyncAPI Studio, and generate code from it. You’ll see how useful AsyncAPI can be in documenting and maintaining your event-driven architectures.
Install AsyncAPI tools
First, let’s install some of the AsyncAPI tools.
AsyncAPI CLI is a CLI tool to create, validate, and explore your AsyncAPI files.
You can install it with brew or npm:
npm install -g @asyncapi/cli
AsyncAPI Generator is another CLI tool to generate documentation and code from your AsyncAPI files.
You can install it with npm:
npm install -g @asyncapi/generator
Install the client library for MQTT protocol as well that we will need later:
npm install mqtt -g
Generate an AsyncAPI sample
Let’s generate a sample AsyncAPI file using the AsyncAPI CLI tool. This tool uses samples in asyncapi/spec/examples.
asyncapi new -n streetlights.yaml
? would you like to start your new file from one of our examples? Yes
? What example would you like to use? Streetlights API Simplified - (protocols: mqtt)
? open in Studio? Yes
Created file streetlights.yaml...
Studio is running at http://localhost:3210?liveServer=3210
Watching changes on file streetlights.yaml
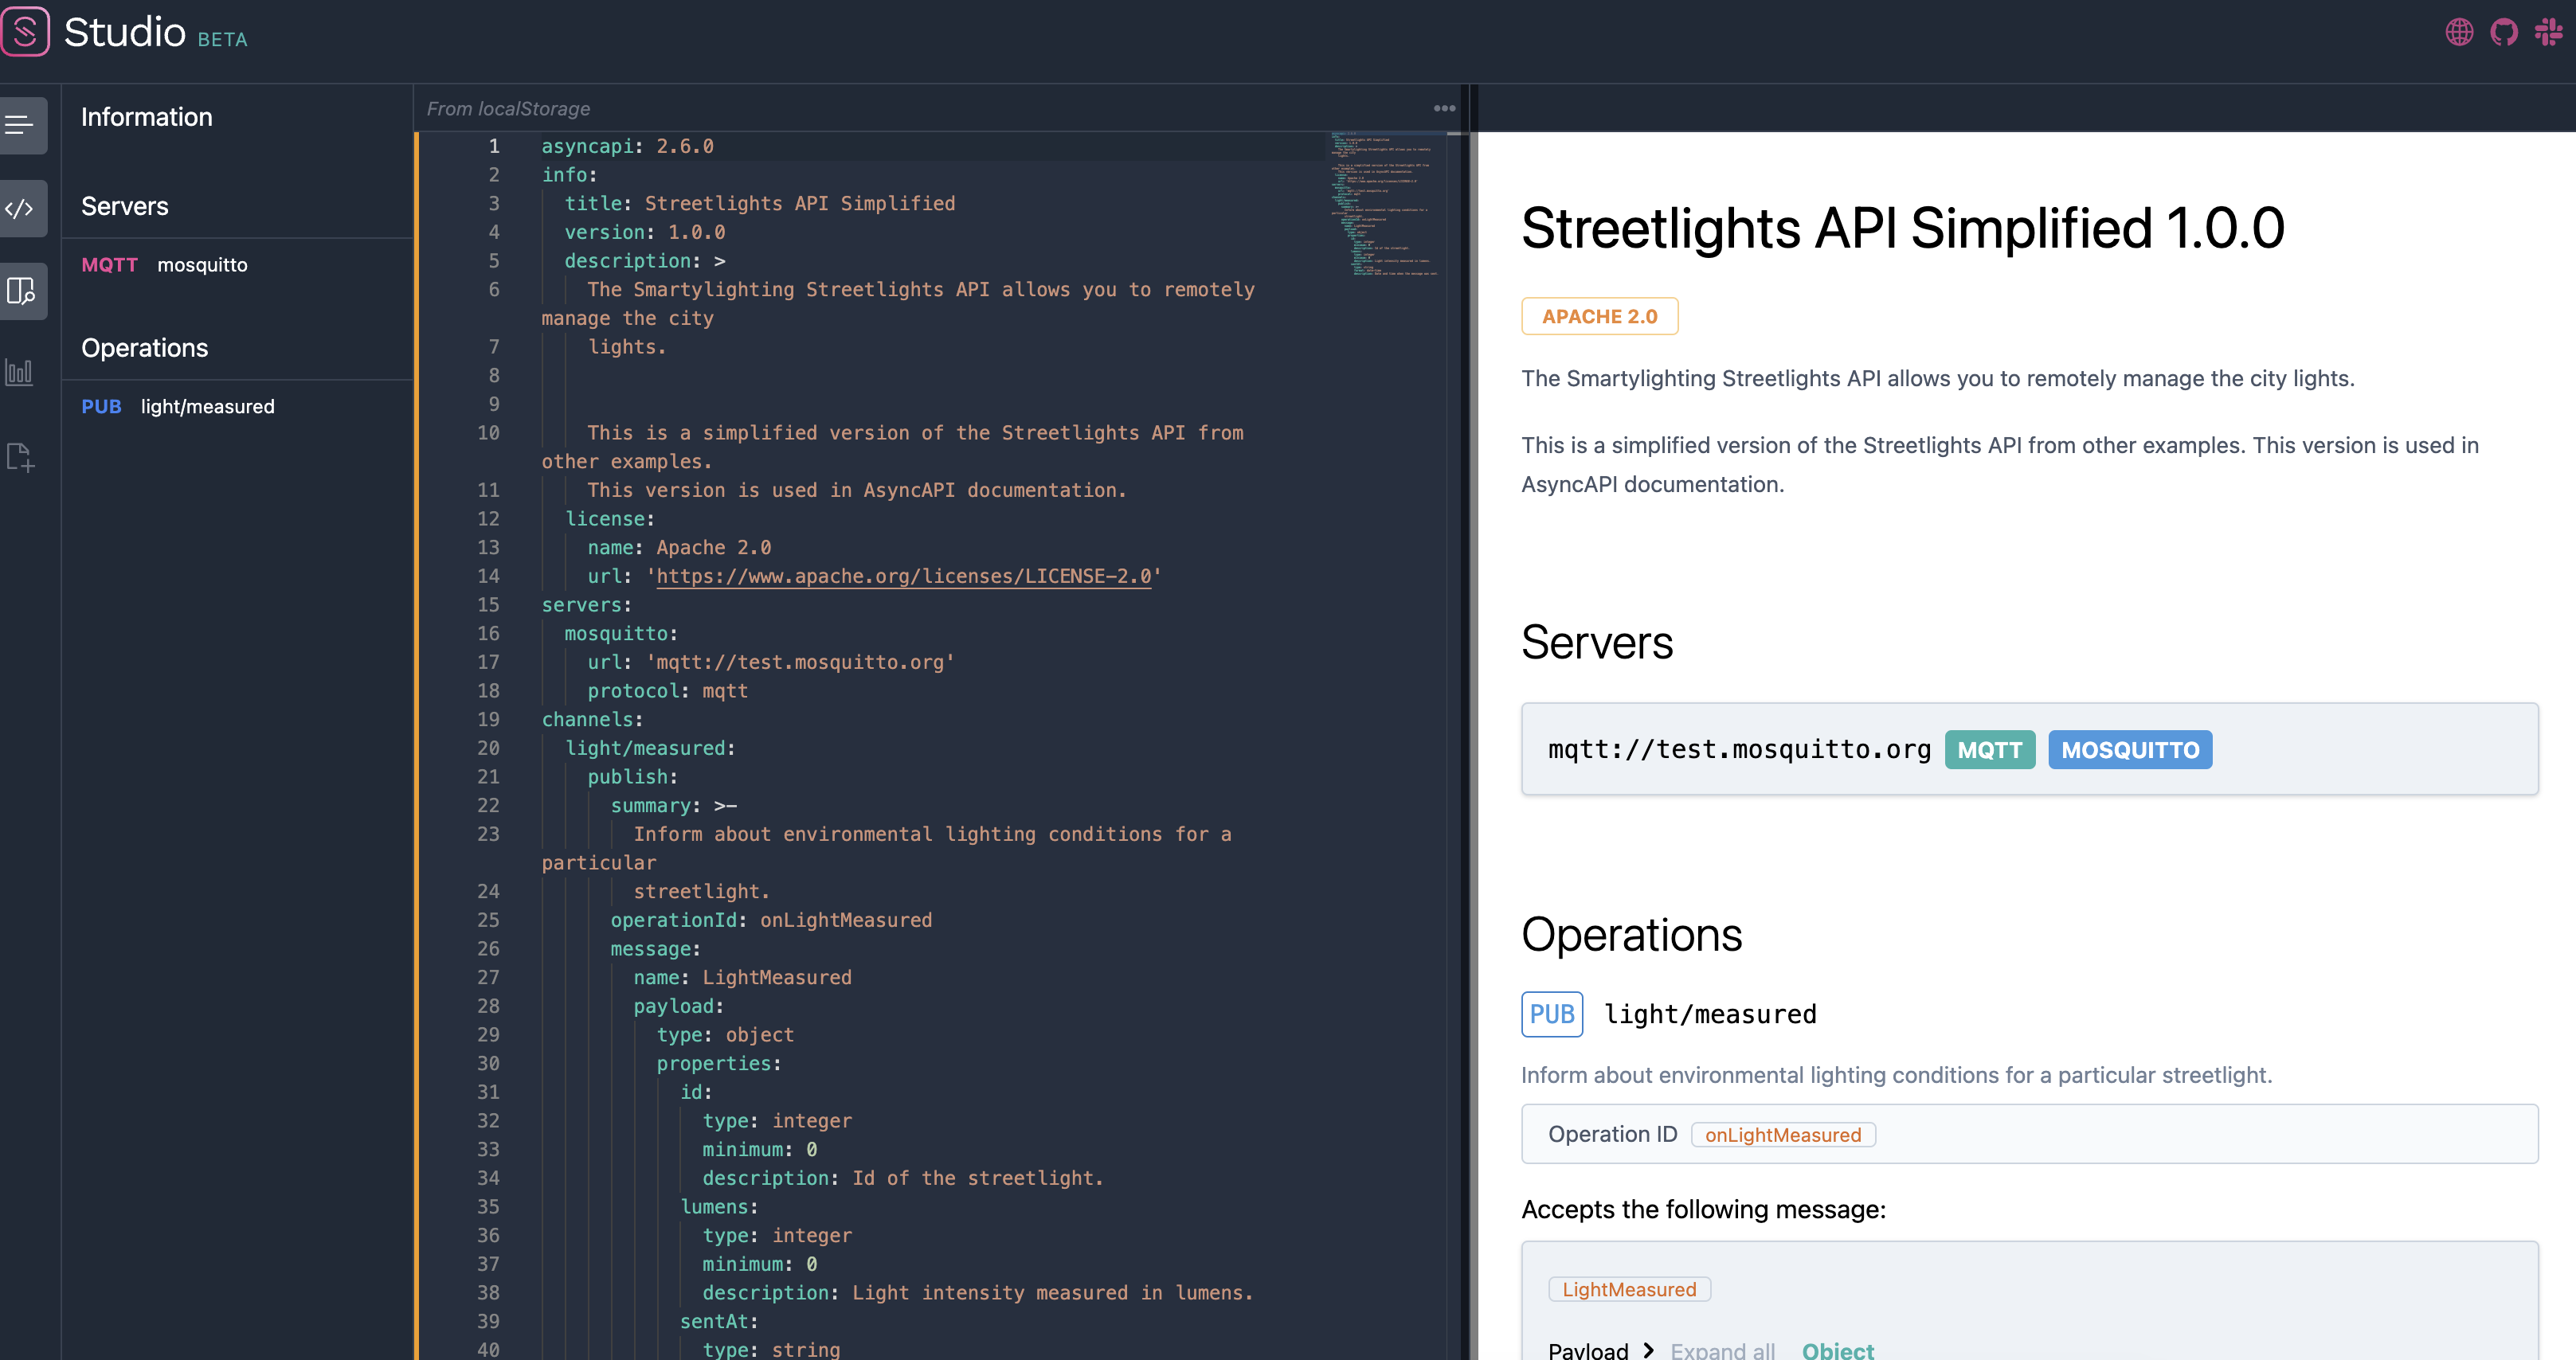
This creates a streetlights.yaml file for a simple event-driven application using MQTT protocol.
You’ll notice that it has an MQTT server:
servers:
  mosquitto:
    url: mqtt://test.mosquitto.org
    protocol: mqtt
It also has a single channel on the server to publish messages to:
channels:
  light/measured:
    publish:
      summary: Inform about environmental lighting conditions for a particular streetlight.
      operationId: onLightMeasured
      message:
        name: LightMeasured
        payload:
          type: object
          properties:
            id:
              type: integer
              minimum: 0
              description: Id of the streetlight.
            lumens:
              type: integer
              minimum: 0
              description: Light intensity measured in lumens.
            sentAt:
              type: string
              format: date-time
              description: Date and time when the message was sent.
Once the file is generated, the AsyncStudio opens it automatically and you can see it visually:
Validate the AsyncAPI file
AsyncStudio warns you if the AsyncAPI file is not valid but you can also validate it using the AsyncAPI CLI:
asyncapi validate streetlights.yaml
...
✖ 5 problems (0 errors, 5 warnings, 0 infos, 0 hints)
Generate code from the AsyncAPI file
Once you have a valid AsyncAPI file, you can use AsyncAPI generators to generate code from it.
For example, this generates code using the Node.js template:
asyncapi generate fromTemplate streetlights.yaml @asyncapi/nodejs-template -o streetlights -p server=mosquitto
It generates a Node.js server, in streetlights folder, capable of receiving MQTT messages outlined in the AsyncAPI file.
You can see the list of official generator templates for other languages and frameworks.
Note: I found these generators quite brittle and limited. They work on a subset of use cases covered by AsyncAPI and as soon as you go beyond basics, they do not work or have some limitation. Nevertheless, they can be useful as you start learning about AsyncAPI.
There are other tools like Modelina to generate data models for your AsyncAPI definitions.
Run the code
Start the generated app:
cd streetlights
npm install
npm start
This starts up the server waiting for MQTT messages:
> streetlights-api-simplified@1.0.0 start
> node src/api/index.js

 SUB  Subscribed to light/measured
Streetlights API Simplified 1.0.0 is ready!

🔗  MQTT adapter is connected!
In a separate terminal, send a message to the server using the MQTT library you installed earlier:
mqtt pub -t 'light/measured' -h 'test.mosquitto.org' -m '{"id": 1, "lumens": 3, "sentAt": "2022-06-07T12:34:32.000Z"}'
You should see that the server received the message:
← light/measured was received:
{ id: 1, lumens: 3, sentAt: '2022-06-07T12:34:32.000Z' }
We generated an AsyncAPI sample, visualized it, validated it, and even generated some starter Node.js code. This is pretty cool!
In the next blog post, I want to show you how to author your own AsyncAPI file for 2 simple microservices and get into more details about publish/subscribe semantics of AsyncAPI, so stay tuned!