

Dialogflow is a developer platform for building voice or text-based conversational apps on a number of platforms such as Google Assistant, Facebook Messenger, Twilio, Skype and more. Earlier this year, we used Dialogflow to build a Google Assistant app and extended it to use the power of Google Cloud. You can read more about it on Google Cloud blog here, see the app code on GitHub here and one of my talk videos about the app is here.
Out of the box, Dialogflow provides features such as intents for matching user input to responses, entities to extract relevant information from conversations, contexts to maintain the state of the conversation. It also provides a way to extend its functionality via fulfillments.
Fulfillment
A fulfillment is a HTTPS webhook that Dialogflow can forward requests to. From then on, your code is in charge of handling the request and generating a response. This is very useful for having custom logic or introducing further intelligence/data to your app. In our app, we used fulfillment to search for images using Google Custom Search, used Vision API to analyze images with Machine Learning and performed rich data analysis with BigQuery.
An easy way of implementing a fulfillment webhook is via the Inline Editor in Dialogflow console. Inline Editor enables you to write a Node.js function to handle Dialogflow requests and deploy it to Cloud Functions with Firebase (see this codelab for details). While Inline Editor is easy, it only allows a single webhook and it’s not developer friendly. Ideally, you’d develop code locally and use some kind of version control.
You can setup a local environment and use Firebase to deploy the function to Cloud Function (this codelab shows how). While this is a more realistic setup, it’s still constrained by Cloud Functions limitations and Node.js is the only language you can use.
AppEngine for fulfillment
In our app, we took a different approach to implement the webhook. Instead of Node.js, we decided to use C# and instead of Cloud Functions, we containerized our app and deployed to App Engine for more flexibility.
Since it’s a container, we could have deployed to Kubernetes Engine as well but we chose App Engine because:
- App Engine gives us a HTTPS endpoint out of the box with minimal hassle whereas Kubernetes Engine HTTPS setup is not trivial.
- Versioning in App Engine allowed us to update and deploy our app easily, test it out and forward all the traffic to the new version when we’re ready.
HelloWorld fulfillment with C#
To give you an idea on how to write a Dialogflow fulfillment on AppEngine using C#, let’s write a HelloWorld fulfillment webhook.
First, you need to first create an ASP.NET Core web app:
dotnet new web -n fulfillment
And add Dialogflow NuGet package to the project. This package will allow us to parse requests from Dialogflow and generate responses:
dotnet add package Google.Cloud.Dialogflow.V2 –version 1.0.0-beta02
Now, we can edit Startup.cs file and add logic to handle Dialogflow requests. We need to first refer to Dialogflow NuGet library and some of its dependencies:
using Google.Cloud.Dialogflow.V2;
using Google.Protobuf;
using System.IO;
Then, we need to create a Protobuf jsonParser that we’ll use to parse the body of HTTP requests:
private static readonly JsonParser jsonParser = new JsonParser(JsonParser.Settings.Default.WithIgnoreUnknownFields(true));
Finally, let’s change the Configure method to parse the request from Dialogflow and simply echo back with a Hello message with the intent name:
app.Run(async (context) => {
   WebhookRequest request;
   using (var reader = new StreamReader(context.Request.Body))
   {
      request = jsonParser.Parse<WebhookRequest>(reader);
   }

   var response = new WebhookResponse
   {
     FulfillmentText = "Hello from " + request.QueryResult.Intent.DisplayName
    };

   await context.Response.WriteAsync(response.ToString());
});
Notice how the HTTP request body is parsed as a WebhookRequest. This is the request Dialogflow sends to our code. In response, we create a WebhookResponse with FulfillmentText and send back. Dialogflow will use the FulfillmentText to say what we asked.
Deploy to App Engine
Now, we’re ready to deploy our code to App Engine. We need to publish the app first:
dotnet publish -c Release
This will create a DLL inside the bin/Release/netcoreapp2.0/publish/ folder. Inside this folder, create an app.yaml file for App Engine with the following contents:
env: flex
runtime: aspnetcore
This will tell App Engine that this is an ASP.NET Core app and it should deploy to App Engine flex.
Finally, deploy to App Engine and let’s call this initial version v0:
gcloud app deploy --version v0
Once the deployment is done, you will have an HTTPS endpoint in the form of https://yourprojectid.appspot.com that you can use a fulfillment webhook in Dialogflow.
Test with Dialogflow
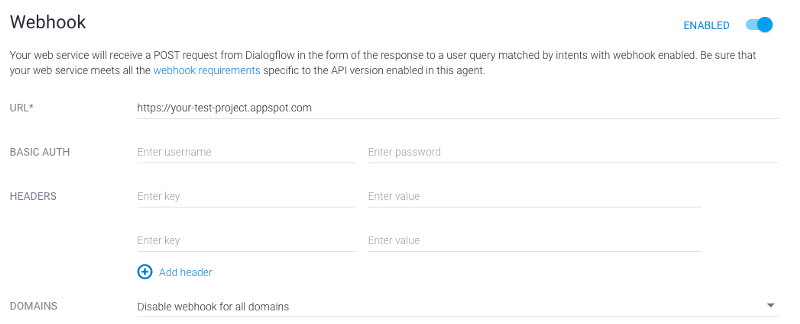
We’re finally ready to test our fulfillment webhook. In Dialogflow console, specify fulfillment url:
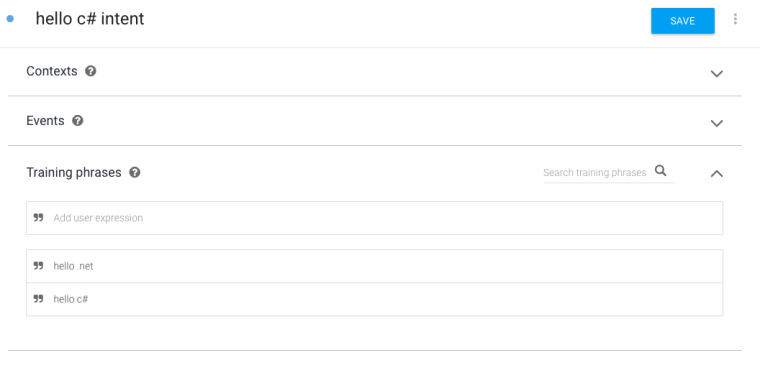
Then, create an intent with some training phrases:
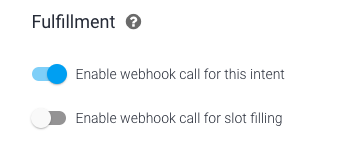
Finally, make sure the fulfillment webhook is enabled for the intent:
We can use the simulator in Dialogflow console to test out the intent:
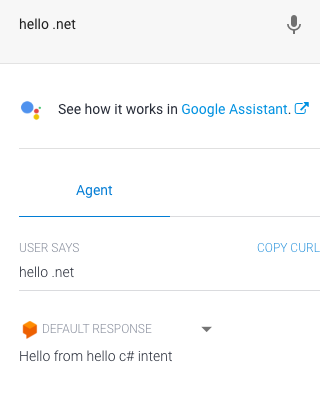
When we say “Hello .NET”, this triggers the webhook and our webhook code simply echoes back the intent name which is “hello c# intent” in this case.
Obviously, a real world webhook would do much more than a simple reply. For example, you would need to keep track of user sessions and get or create conversations based on those sessions (see DialogflowApp of our app on GitHub). You also need to find a way to match intents to handlers on the server (see Conversation of our app on GitHub on this).
Hopefully, this blog post provided the basics to get started with fulfillment webhook using C# and App Engine.