In Part 1, I talked about Knative Serving for rapid deployment and autoscaling of serverless containers. In Part 2, I talked about how to connect services in a loosely coupled way with Knative Eventing.
In third and last part of the series, I want to talk about Knative Build and show a few examples from my Knative Tutorial.
What is Knative Build?
Knative Build basically allows you to go from source code to a container image in a registry. For example, you can write a build to obtain your source code from a repository, build a container image, push that image to a registry and then run that image, all within the Kubernetes cluster.
Knative Build Primitives
There 4 main primitives for Knative Build:
- Build: Represents an in-cluster build job with 1 or more steps.
- BuildTemplate: A set of ordered and parameterized build steps.
- Builder: A container in a Build step that performs an action (eg. build an image)
- ServiceAccount: For authentication with DockerHub etc.
Let’s look at a concrete example.
Hello World Build
In Hello World Build from my Knative Tutorial, we design a Build to build and push a container to Google Cloud Container Registry (GCR) with Kaniko.
Kaniko is a tool to build container images from a Dockerfile, inside a container in Kubernetes cluster. The advantage of Kaniko is that it doesn’t depend on a Docker daemon.
Create a build-helloworld-csharp-gcr.yaml build file. This uses Knative Build to download the source code in the ‘workspace’ directory and then use Kaniko as a Builder to build and push an image to GCR:
apiVersion: build.knative.dev/v1alpha1
kind: Build
metadata:
  name: build-helloworld-csharp-gcr
spec:
  source:
    git:
      url: "https://github.com/knative/docs.git"
      revision: "v0.1.x"
    subPath: "serving/samples/helloworld-csharp/"
  steps:
  - name: build-and-push
    image: "gcr.io/kaniko-project/executor:v0.6.0"
    args:
    - "--dockerfile=/workspace/Dockerfile"
    # MY\_GCP\_PROJECT: Replace with the GCP Project's ID.
    - "--destination=gcr.io/MY\_GCP\_PROJECT/helloworld-csharp:knativebuild"
You can kick the build by simply applying the yaml file (and see the progress as described in the tutorial):
kubectl apply -f build-helloworld-csharp-gcr.yaml
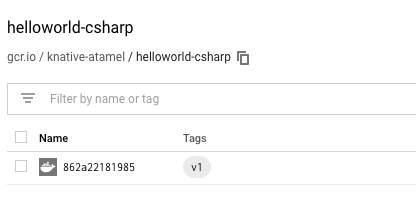
At the end of the build, you should see an image pushed to GCR:
Secrets with ServiceAccount
The previous example did not require authentication. What if you want to push to DockerHub where authentication is not optional? My Docker Hub Build tutorial explains the steps in detail but to recap here, you need to:
- Create a Secret in Kubernetes with Base64 encoded username and password for DockerHub.
- Create a ServiceAccount in Kubernetes that uses that Secret.
- Create a Build in Knative that uses that ServiceAccount.
The Build definition will be very similar to before, except it has an additional ServiceAccount section used for authentication:
apiVersion: build.knative.dev/v1alpha1
kind: Build
metadata:
  name: build-helloworld-csharp-docker
spec:
  **serviceAccountName: build-bot**
  source:
    git:
      url: "https://github.com/knative/docs.git"
      revision: "v0.1.x"
    subPath: "serving/samples/helloworld-csharp/"
  steps:
  - name: build-and-push
    image: "gcr.io/kaniko-project/executor:v0.6.0"
    args:
    - "--dockerfile=/workspace/Dockerfile"
    # Replace {username} with your actual DockerHub
    - "--destination=docker.io/{username}/helloworld-csharp:knativebuild"
BuildTemplates and Kaniko
So far, we manually defined all the steps needed in our Build. BuildTemplate allows you to create Build steps as templates and reuse these steps from different Builds. Using Knative to deploy serverless applications to Kubernetes codelab shows how to create your own custom templates.
Knative also comes with a number of BuildTemplates that you can reuse in your Builds. One of those templates is for Kaniko. Let’s install that template to make it easier to use Kaniko in our Builds:
kubectl apply -f https://raw.githubusercontent.com/knative/build-templates/master/kaniko/kaniko.yaml
Check that the template is installed:
kubectl get buildtemplate
NAME      AGE
kaniko    24m
In the next section, we’ll use this template to run automatic builds.
Automatic Build
In Knative, you can configure a Knative Service with a Build step. This allows Knative to build and push a container image whenever there’s a change in the service. I personally do not mixing serving and building, espeially for production, but it might be a good option for testing.
I have detailed instructions on how to set this up in Automatic Build section of my tutorial but you basically need a service definition file that looks like this:
apiVersion: serving.knative.dev/v1alpha1
kind: Service
metadata:
  name: helloworld-csharp-from-source
  namespace: default
spec:
  runLatest:
    configuration:
      **build**:
        apiVersion: build.knative.dev/v1alpha1
        kind: Build
        spec:
          serviceAccountName: build-bot
          source:
            git:
              url: https://github.com/meteatamel/knative-tutorial.git
              revision: master
            subPath: "serving/helloworld-csharp/"
          **template**:
            name: kaniko
            arguments:
              - name: IMAGE
                # Replace {username} with your actual DockerHub
                value: docker.io/{username}/helloworld-csharp:from-source
      revisionTemplate:
        spec:
          container:
            # Replace {username} with your actual DockerHub
            image: docker.io/{username}/helloworld-csharp:from-source
            imagePullPolicy: Always
            env:
              - name: TARGET
                value: "C# Sample from-source"
Notice the in-line build section of the configuration and how it uses the Kaniko template we installed before.
Once you apply this service, you should see a Build being created to build and push the image and soon after, you should see a Knative service up and running.
This concludes my 3 part series on Knative. Hope you enjoyed it and let me know what other Knative topics you’d like to read about.