
As part of my Istio 101 talk, I like to show demos locally (because conference Wifi can be unreliable) and Minikube is perfect for this. Minikube gives you a local Kubernetes cluster on top of which you can install Istio.
In this post, I want to show how to do Istio 101 on Minikube. More specifically, I will show how to install Istio, deploy a sample application, install add-ons like Prometheus, Grafana, Zipkin, ServiceGraph and change traffic routes dynamically.
Minikube and kubectl
First, you need to install Minikube. There are instructions are on Minikube page. Once installed, you can start it with minikube start command and make sure it is running with minikube status:
> minikube status minikube: Running cluster: Running kubectl: Correctly configured: pointing to minikube-vm at …
Also make sure kubectl points to your minikube cluster with this:
> kubectl config use-context minikube Switched to context “minikube”
Download & Setup Istio
Let’s download the latest Istio (0.7.1 as of today):
> curl -L https://git.io/getLatestIstio | sh -
Add Istio’s command line tool istioctl to your PATH. We’ll need it later:
> export PATH="$PATH:./istio-0.7.1/bin"
Install Istio
Now it’s time to install Istio. You can install Istio with or without mutual TLS enabled between services. In this case, let’s go with mutual TLS. Inside istio folder:
> kubectl apply -f install/kubernetes/istio-auth.yaml …
service “istio-pilot” created
serviceaccount “istio-pilot-service-account” created deployment.extensions “istio-pilot” created
service “istio-ingress” created
serviceaccount “istio-ingress-service-account” created deployment.extensions “istio-ingress” created
serviceaccount “istio-ca-service-account” created deployment.extensions “istio-ca” created …
This installs Istio and its core components like ingress, mixer, pilot into a separate istio-system namespace. Let’s make sure Istio related pods and services are running:
> kubectl get svc -n istio-system
NAME TYPE CLUSTER-IP EXTERNAL-IP istio-ingress LoadBalancer 10.99.175.236
Deploy BookInfo app
Now, we can deploy a sample app and get it managed by Istio. You have two choices here. First, you can install Istio initializer. This way, when a pod is created, a sidecar Envoy proxy will be created automatically but this requires a more complex setup with WebHooks and certificates. Your second option is to use istioctl command and inject the sidecar proxy yourself when you create the application pod. I’ll go for the second option as it’s easier to setup.
Istio comes with a number of sample apps under samples folder. Let’s go with the BookInfo app:
> kubectl create -f <(istioctl kube-inject -f samples/bookinfo/kube/bookinfo.yaml service “details” created
deployment.extensions “details-v1” created service “ratings” created deployment.extensions “ratings-v1” created service “reviews” created deployment.extensions “reviews-v1” created deployment.extensions “reviews-v2” created deployment.extensions “reviews-v3” created service “productpage” created deployment.extensions “productpage-v1” created ingress.extensions “gateway” created
As you can see, this creates bunch of microservices and some microservices have different versions as well.
Show BookInfo app
Now, let’s take a look at the app. External load balancers are not supported in Minikube. However, you can use the host IP of the ingress service, along with the NodePort, to access the ingress. To do that, we’ll set a GATEWAY_URL variable:
> export GATEWAY_URL=$(kubectl get po -l istio=ingress -n istio-system -o ‘jsonpath={.items[0].status.hostIP}’):$(kubectl get svc istio-ingress -n istio-system -o ‘jsonpath={.spec.ports[0].nodePort}’)
And test with curl:
> curl -o /dev/null -s -w “%{http_code}\n” http://${GATEWAY_URL}/productpage 200
You can also open a browser and see the web frontend for product page:
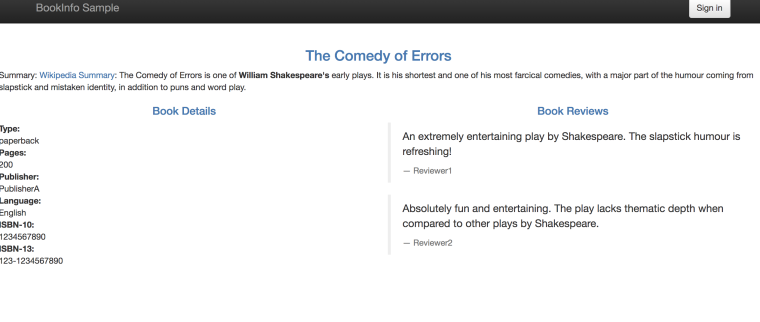
At this point, we got the app deployed and managed by a basic installation of Istio. Next, we’ll install some add-ons.
Prometheus for metrics
The first add-on we’ll install is Prometheus for metrics.
> kubectl apply -f install/kubernetes/addons/prometheus.yaml configmap “prometheus” created service “prometheus” created deployment.extensions “prometheus” created serviceaccount “prometheus” created clusterrole.rbac.authorization.k8s.io “prometheus” configured clusterrolebinding.rbac.authorization.k8s.io “prometheus” configured
In a separate command tab, start sending some traffic to our app, so we can have some metrics flowing in our system:
> for i in {1..10}; do curl -o /dev/null -s -w “%{http_code}\n” http://${GATEWAY_URL}/productpage; done 200 200 …
And setup port forwarding, so we can take a look at Prometheus:
> kubectl -n istio-system port-forward $(kubectl -n istio-system get pod -l app=prometheus -o jsonpath=’{.items[0].metadata.name}’) 9090:9090
You can navigate to http://localhost:9090 and query some metrics, such as istio_request_count:

Grafana for dashboard
To visualize metrics in a nice dashboard, we can install Grafana. First install Grafana add-on:
> kubectl apply -f install/kubernetes/addons/grafana.yaml
And then setup port forwarding:
> kubectl -n istio-system port-forward $(kubectl -n istio-system get pod -l app=grafana -o jsonpath=’{.items[0].metadata.name}’) 3000:3000
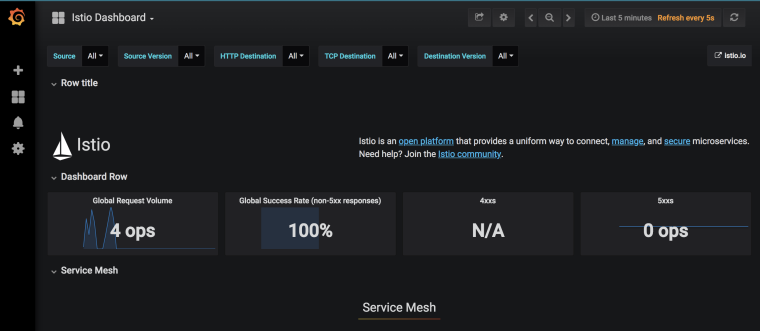
Navigate to http://localhost:3000 and go to Istio Dashboard to see the dashboard:
Zipkin for tracing
Another useful add-on is Zipkin for distributed HTTP tracing. Just like other add-ons, first install it:
> kubectl apply -f install/kubernetes/addons/zipkin.yaml deployment.extensions “zipkin” created service “zipkin” created
Then, setup port forwarding:
> kubectl port-forward -n istio-system $(kubectl get pod -n istio-system -l app=zipkin -o jsonpath=’{.items[0].metadata.name}’) 9411:9411
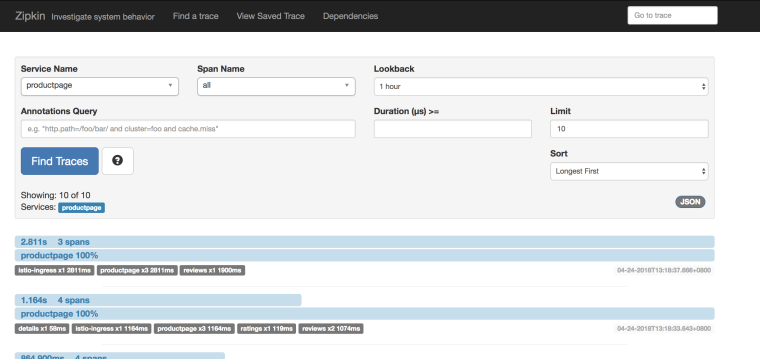
Navigate to http://localhost:9411 to and take a look at traces for productpage:
ServiceGraph for dependency visualization
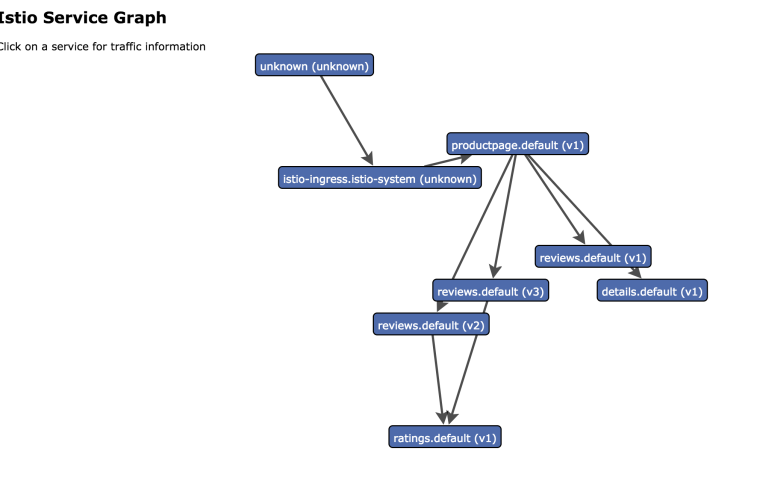
Finally, the last add-on we’ll take a look is my-favorite ServiceGraph. It gives us a nice graph of all microservice dependencides in our service mesh. First, install it:
> kubectl apply -f install/kubernetes/addons/servicegraph.yaml deployment.extensions “servicegraph” created service “servicegraph” created
Then, setup port forwarding:
> kubectl -n istio-system port-forward $(kubectl -n istio-system get pod -l app=servicegraph -o jsonpath=’{.items[0].metadata.name}’) 8088:8088
There are a few different graphs you can take a look:
Traffic Management
One of the nice things about Istio is that you can change routing rules between microservices dynamically. By default, there are no routing rules and you can see that by:
> istioctl get routerules No resources found.
When you go to the product page of BookInfo application and do a browser refresh a few times, you will see that the reviews section on the right keeps changing (the stars change color). This is because there are 3 different reviews microservices and everytime, a different microservice is invoked .
It is very easy though to pin microservices to a certain version. For example, let’s pin all microservices to version1:
> istioctl create -f samples/bookinfo/kube/route-rule-all-v1.yaml Created config route-rule/default/productpage-default at revision 185533 Created config route-rule/default/reviews-default at revision 185534 Created config route-rule/default/ratings-default at revision 185535 Created config route-rule/default/details-default at revision 185536
Now, if you back to the product page and do a browser refresh, nothing changes because reviews microservice is pinned to version 1 now.
You can do even more complicated routing rules. For example, you can pin certain users to certain versions of a microservice. In this case, let’s pin the user “Jason”:
> istioctl create -f samples/bookinfo/kube/route-rule-reviews-test-v2.yaml Created config route-rule/default/reviews-test-v2 at revision 185630
With this rule, if you login to the product page with username “Jason”, you should see the v2 version of reviews microservice.
Cleanup
This wraps up all the basic functionality of Istio that I wanted to show in Minikube.
To cleanup, let’s first delete the route rules:
> istioctl delete -f samples/bookinfo/kube/route-rule-all-v1.yaml Deleted config: route-rule/default/productpage-default Deleted config: route-rule/default/reviews-default Deleted config: route-rule/default/ratings-default Deleted config: route-rule/default/details-default > istio-0.7.1 istioctl delete -f samples/bookinfo/kube/route-rule-reviews-test-v2.yaml Deleted config: route-rule/default/reviews-test-v2
To delete Istio:
> kubectl delete -f install/kubernetes/istio-auth.yaml
At this point, everything related about Istio is deleted but the sample app is running. It’s just not managed by Istio anymore. If you want to delete the sample app as well:
> kubectl delete -f samples/bookinfo/kube/bookinfo.yaml service “details” deleted deployment.extensions “details-v1” deleted service “ratings” deleted deployment.extensions “ratings-v1” deleted service “reviews” deleted deployment.extensions “reviews-v1” deleted deployment.extensions “reviews-v2” deleted deployment.extensions “reviews-v3” deleted service “productpage” deleted deployment.extensions “productpage-v1” deleted ingress.extensions “gateway” deleted
Originally published at meteatamel.wordpress.com on April 24, 2018.